Categories let shoppers narrow the map to one kind of stockist: a product range, a shop type, a brand.
What shoppers see
- Filter buttons above the map, one per category, once two or more categories are in use.
- Tags on each stockist, on its entry in the list and in its pin's popup, showing what that stockist carries.
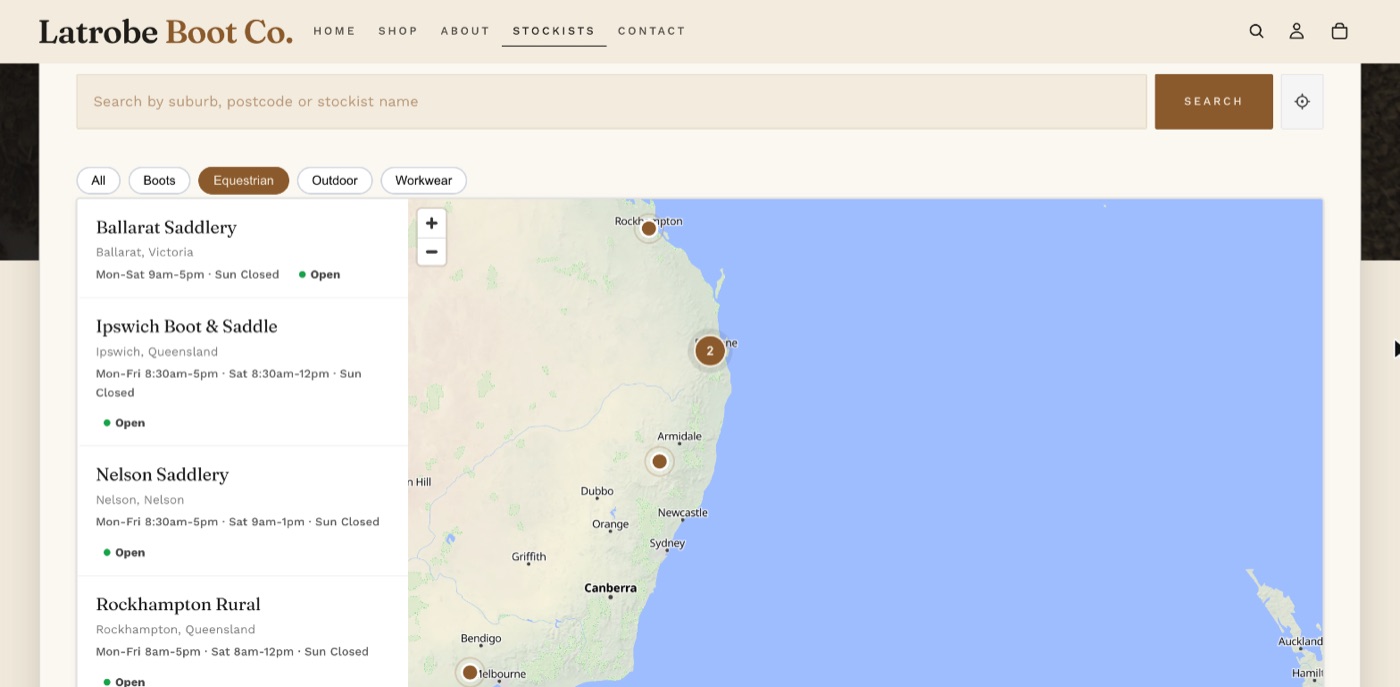
Way 1: type a category on the stockist
- On the app's Locations page, open the stockist.
- In Category type free text such as Flagship, Boots or Workwear.
- For several, separate them with commas:
Boots, Workwear. - Save.
In a spreadsheet, use the category column the same way.
Way 2: use customer tags as filters
If your stockists are tagged customers, their Shopify tags can be the categories.
- Open the app's Settings.
- Under Filters, in Customer tags to show as filters, list the tags separated by commas, for example
boots, workwear, outdoor. - Save.
A stockist carrying one of these tags is filed under it.
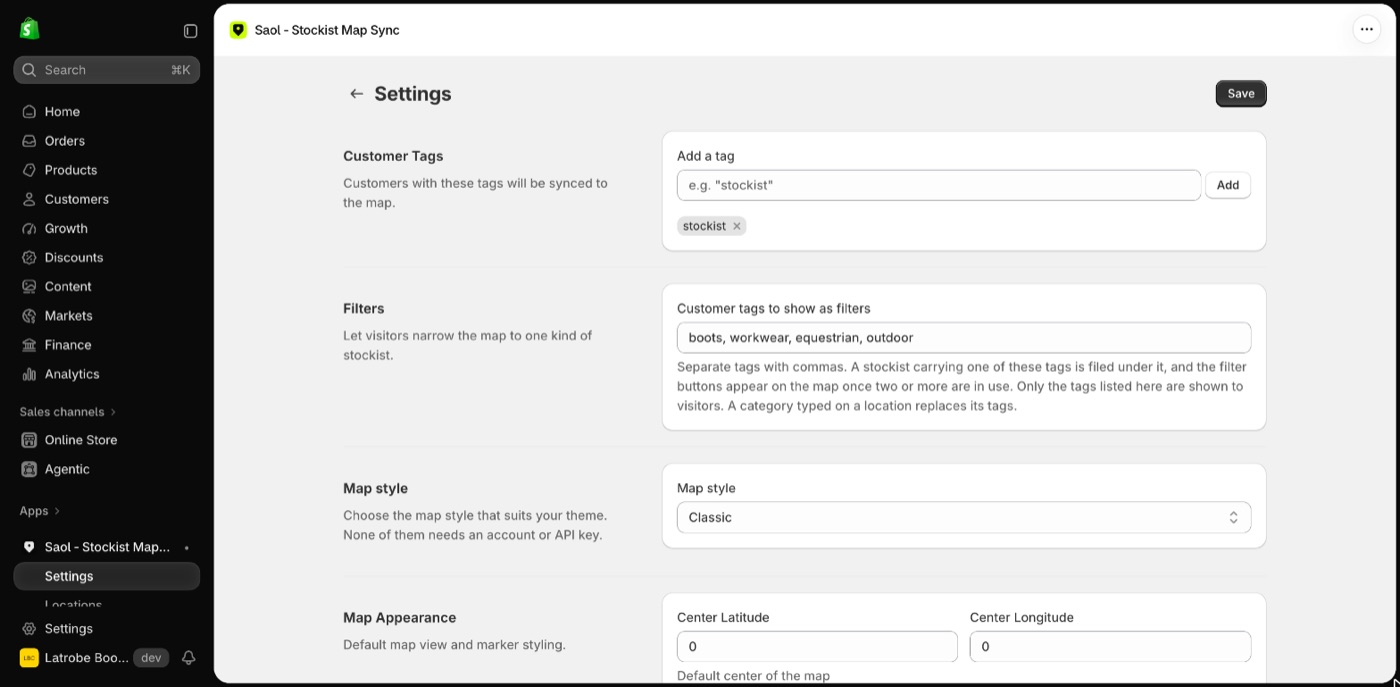
Only the tags you list are shown to shoppers. Every other customer tag stays private.
Which one wins
A category typed on a stockist replaces its tags. If the Category is left empty, the stockist's listed customer tags are used.
No filter buttons showing?
Filter buttons appear only when two or more different categories are in use across your visible stockists.
Still stuck? Email [email protected] or ask the assistant in the corner of this page. I answer within one business day, Brisbane time.