Open Settings from the app's menu. Press Save at the top after any change. Changes can take up to five minutes to appear on your storefront.
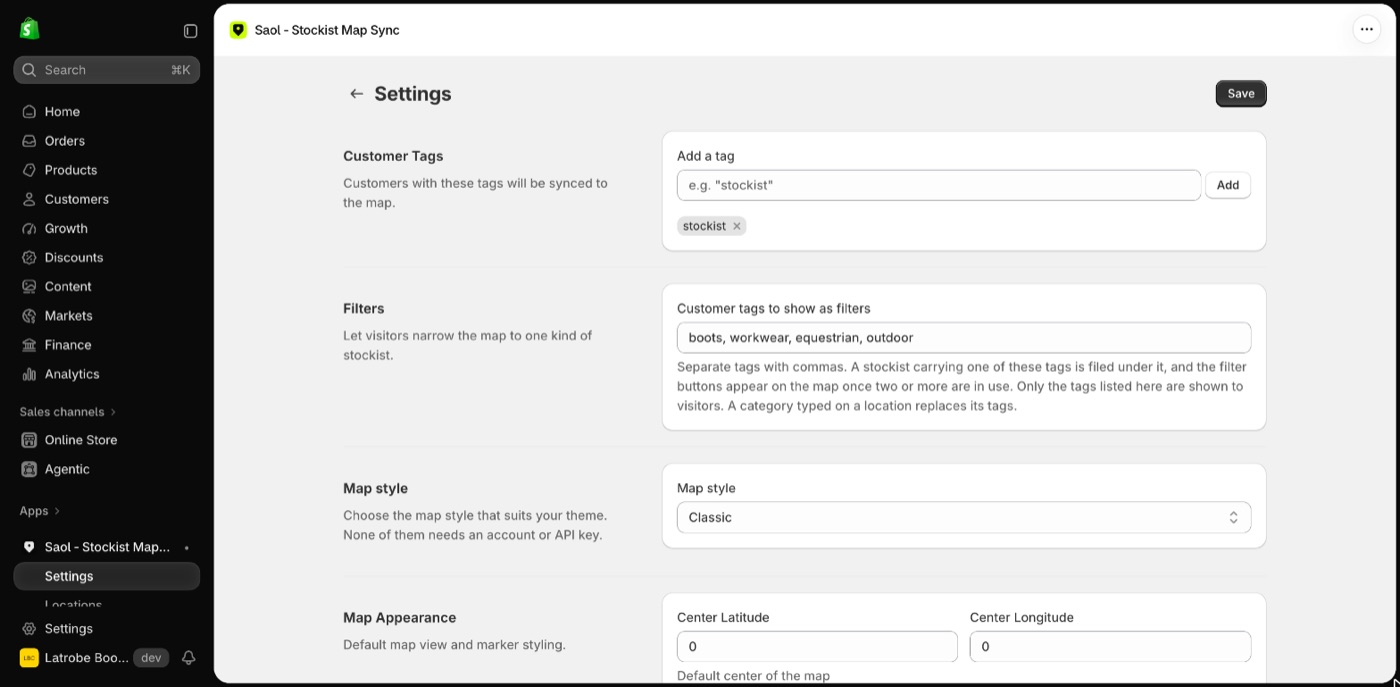
Customer Tags
Customers with these tags are synced to the map. Type a tag and press Add. A customer with any one of the tags is synced. After changing tags, press Sync Now on the Dashboard. See Sync stockists from customer tags.
Filters
Customer tags to show as filters: tags separated by commas. See Categories and filter buttons.
Map style
One of eleven. See Map styles and your brand colour.
Map Appearance
- Center Latitude and Center Longitude: the default centre of the map. Leave both at 0 to let the map fit itself around all your stockists, which suits most stores.
- Zoom Level (1 to 18): used with the centre. 1 is the whole world, 18 is street level; 4 suits a country, 10 a city.
- Marker colour: the colour of the pins, the cluster circles, the Search button and the highlights in the list. Pick it, or type your brand colour as a hex code such as
#81B458. - Enable marker clustering: groups nearby pins into a numbered circle when zoomed out. Recommended for more than about 30 stockists. On by default.
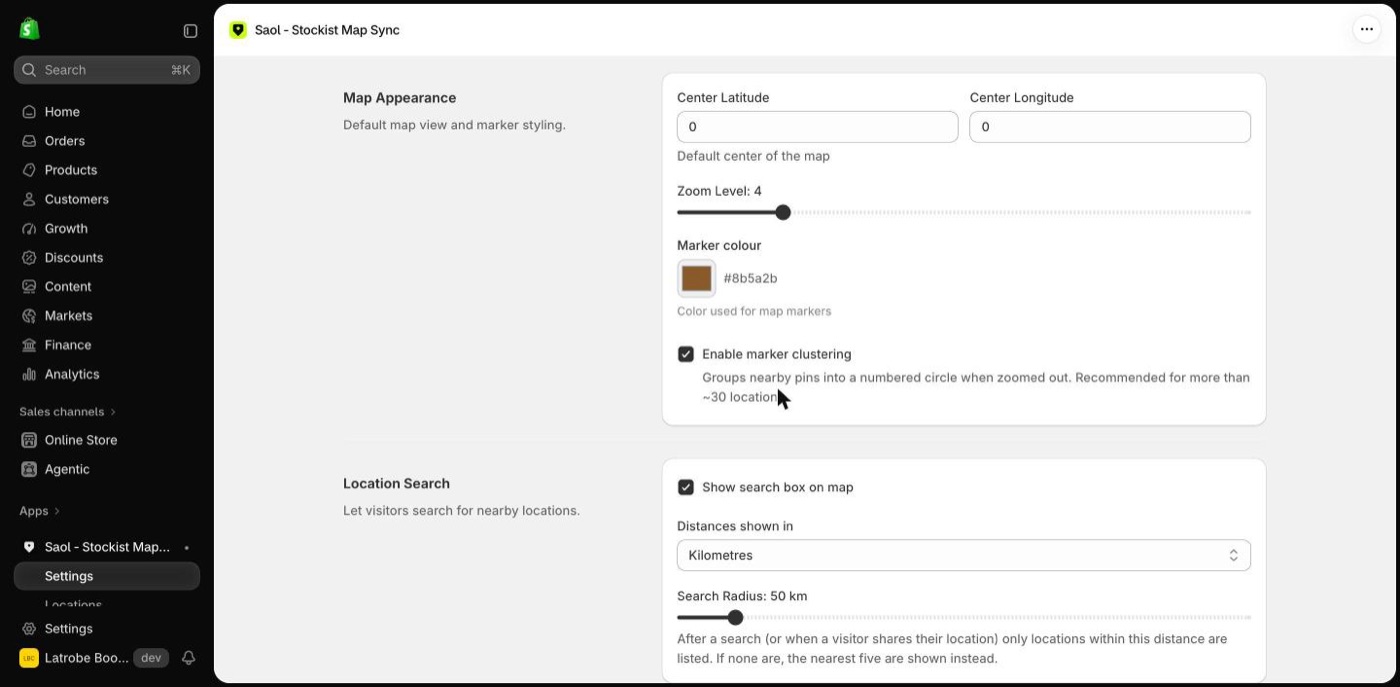
Location Search
- Show search box on map: on by default.
- Distances shown in: Kilometres or Miles.
- Search Radius (5 to 500, default 50): after a search, or when a shopper shares their location, only stockists within this distance are listed. If none are, the nearest five are shown instead.
Settings that live in the theme editor
The heading, map height, layout, search box text and grouping by state are on the map block itself. See The map block's settings.
Still stuck? Email [email protected] or ask the assistant in the corner of this page. I answer within one business day, Brisbane time.