Setup is two steps. Most stores are done in about five minutes.
Step 1: add your stockists
Choose whichever suits you. They can be mixed.
- Tag customers. In Shopify admin open a stockist under Customers, add the tag
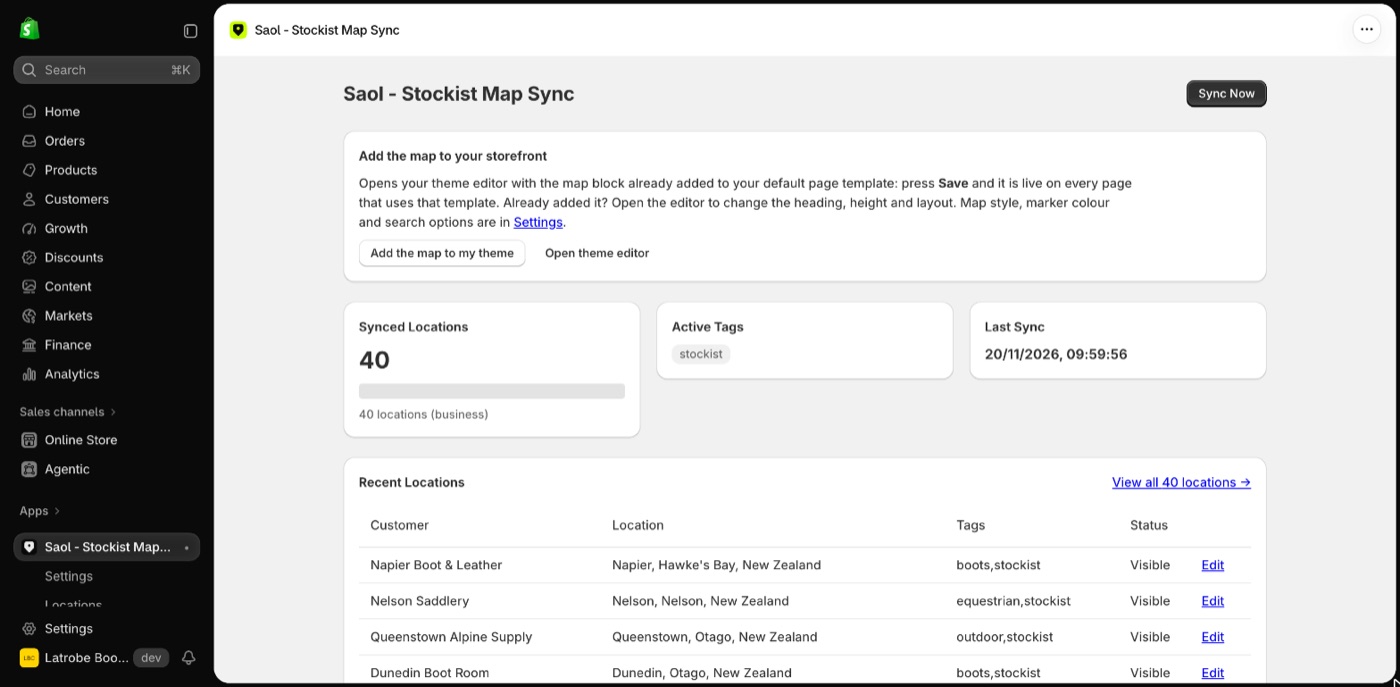
stockistand save. Then press Sync Now on the app's Dashboard. See Sync stockists from customer tags. - Import a spreadsheet. Open the app's Import page, download the template, fill it in and upload it. See Import stockists from a spreadsheet.
- Add one by hand. On the Dashboard press Add a location. See Add a stockist by hand.
Step 2: put the map on a page
- In Shopify admin go to Online Store, then Pages, and add a page called, for example, Stockists. It can be left empty.
- In the app's Dashboard press Add the map to my theme. The theme editor opens with the map block already added.
- Press Save in the theme editor.
- Add the page to your store's menu under Online Store, then Navigation.
The button adds the block to your theme's default page template, which other pages such as About and Contact usually share. To show the map on the stockists page only, follow Give the map a page of its own.
Then make it yours
- Choose a map style and your brand colour
- Turn categories or tags into filter buttons
- Add opening hours
Still stuck? Email [email protected] or ask the assistant in the corner of this page. I answer within one business day, Brisbane time.